Introduction
Renaming a database in SQL Server that is part of an Always On Availability Group requires careful planning and execution to ensure minimal impact on the availability and functionality of your database environment. This blog post will guide you through the necessary steps, considerations, and potential impacts when renaming a database in an Always On Availability Group.
Step 1: Understand the Impacts
Renaming a database in an Always On Availability Group is a complex operation with several considerations:
- High Availability: The primary goal of an Always On Availability Group is to provide high availability. Any actions taken should ensure minimal downtime and data loss.
- Synchronization: The renamed database must be synchronized across all replicas in the availability group.
- Application Impact: Applications connecting to the database need to be updated with the new database name.
- Backup and Restore: Existing backup and restore processes, maintenance plans, and scripts may need to be updated.
- Replication: If the database is being replicated, the replication configuration may need adjustments.
Step 2: Prepare the Environment
Before you proceed with the renaming process, it’s essential to ensure you have a proper backup of the existing database and a plan for a rollback in case of any issues. Follow these steps:
- Take a Full Backup: Ensure you have a recent full backup of the database on all replicas.
-- Backup the 'AdventureWorksOTI' database to a specified disk location
BACKUP DATABASE [AdventureWorksOTI]
TO DISK = N'D:\SQL_DATA\AdventureWorksOTI.bak'
WITH
    NOFORMAT,               -- Do not write media header information
    NOINIT,                 -- Append to the existing backup media
    NAME = N'AdventureWorksOTI-Full Database Backup',  -- Name for the backup set
    SKIP,                   -- Skip writing to tape or disk
    NOREWIND,               -- Do not rewind the tape after backup
    NOUNLOAD,               -- Do not unload the tape or disk file after backup
    COMPRESSION,            -- Use backup compression
    STATS = 1;              -- Display detailed statistics during backup
GO
- Notify Stakeholders: Inform your team, application owners, and other stakeholders about the planned database rename. Coordinate the downtime window if needed.
- Update Connection Strings: Identify all applications that connect to the database and update their connection strings to use the new database name once the rename is complete.
Step 3: Rename the Database
Follow these steps to rename the database in the Always On Availability Group:
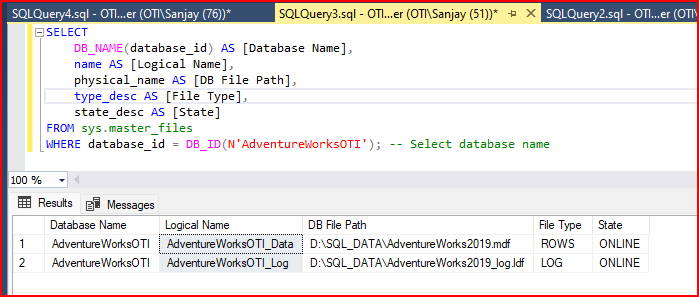
- First checking database name, logical name, physical file name with below T-SQL script
SELECT
    DB_NAME(database_id) AS [Database Name],
    name AS [Logical Name],
    physical_name AS [DB File Path],
    type_desc AS [File Type],
    state_desc AS [State]
FROM sys.master_files
WHERE database_id = DB_ID(N'AdventureWorks2022'); -- Select database name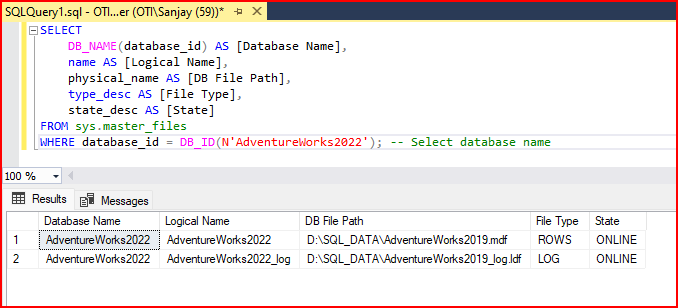
- Removing a database from an Availability Group using both Transact-SQL and SQL Server Management Studio (SSMS).
- Using Transact-SQL:
- Open SQL Server Management Studio.
- Connect to the primary replica of the Availability Group.
- Open a new query window and execute the following commands:
USE master;
GO

-- Take the database out of the Availability Group
ALTER DATABASE YourDatabaseName
SET HADR OFF;
GOReplace YourDatabaseName with the actual name of the database you want to remove.
- Using SQL Server Management Studio:
- Open SQL Server Management Studio.
- Connect to the primary replica of the Availability Group.
- In Object Explorer, navigate to the ‘Always On High Availability’ node.
- Expand the Availability Group node to display the list of databases in the group.
- Right-click on the database you want to remove and select ‘Properties.’
- In the properties window, go to the ‘Data synchronization’ tab.
- Uncheck the checkbox labeled ‘Enable automatic failover’ and click ‘OK.’
- Right-click on the database again and select ‘Tasks’ > ‘Remove from Availability Group.’
- Confirm the removal in the pop-up dialog.
Remember to adjust your maintenance window accordingly and ensure that removing the database from the Availability Group won’t impact your production environment negatively.
- Remove the Database from the Availability Group: Connect to the primary replica and remove the database from the availability group. Below are the Microsoft official documentation.
- Rename the Database: Connect to the primary replica and use the `ALTER DATABASE` statement with the `MODIFY NAME` clause to rename the database.
-- Rename Database Using sp_renamedb System Stored Procedure

USE master
GO

ALTER DATABASE AdventureWorks2022-- Select current database name
SET SINGLE_USER
WITH ROLLBACK IMMEDIATE
GO

EXEC master..sp_renamedb 'AdventureWorks2022','AdventureWorksOTI'
GO

ALTER DATABASE AdventureWorksOTI -- Select new database name
SET MULTI_USER
GO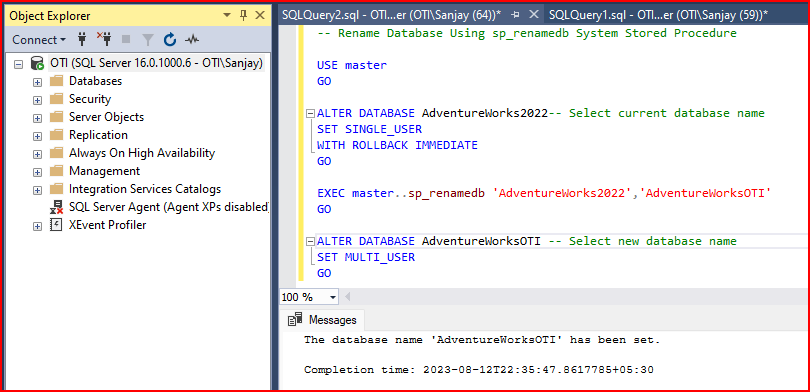
- Checking database name, logical name, physical file name again
SELECT
    DB_NAME(database_id) AS [Database Name],
    name AS [Logical Name],
    physical_name AS [DB File Path],
    type_desc AS [File Type],
    state_desc AS [State]
FROM sys.master_files
WHERE database_id = DB_ID(N'AdventureWorksOTI'); -- Select new database name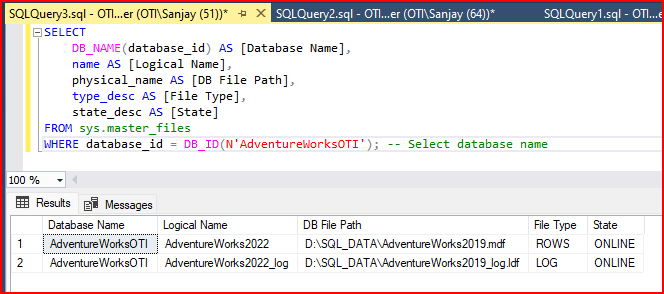
- Now rename Database Logical Name using T-SQL scripts
-- Rename Database Logical Name using T-SQL scripts

/* Set Database as a Single User */
ALTER DATABASE AdventureWorksOTI SET SINGLE_USER WITH ROLLBACK IMMEDIATE
GO

/* Change Logical Data File Names */
ALTER DATABASE AdventureWorksOTI MODIFY FILE (NAME=N'AdventureWorks2022', NEWNAME=N'AdventureWorksOTI_Data')
GO

/* Change Logical Log File Names */
ALTER DATABASE AdventureWorksOTI MODIFY FILE (NAME=N'AdventureWorks2022_log', NEWNAME=N'AdventureWorksOTI_Log')
GO

/* Set Database as a Multi User */
ALTER DATABASE AdventureWorksOTI SET MULTI_USER
GO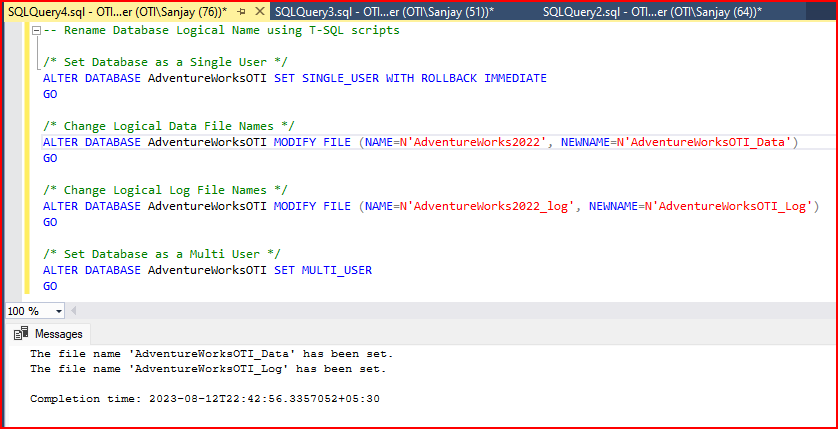
- Checking database name, logical name, physical file name
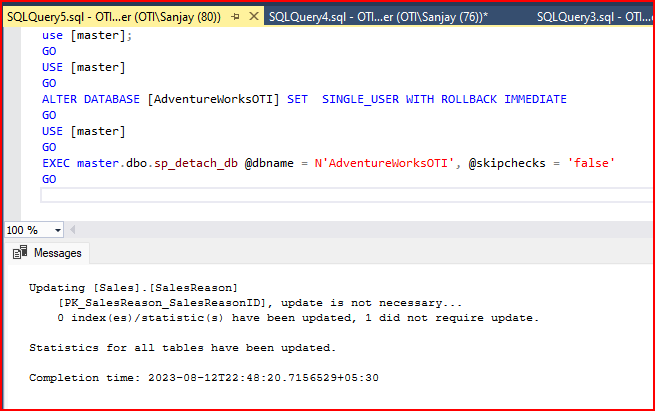
- Changing physical file name after detach the database. Use GUI or below T-SQL script to detach the database. To detach database you must check ‘Drop Connection’ in GUI and ‘Update Statistics’ is optional. In T-SQL also ‘Update Statistics’ can be enable/disable by using @skipchecks = ‘false’ or ‘true’.

use [master];
GO
USE [master]
GO
ALTER DATABASE [AdventureWorksOTI] SET  SINGLE_USER WITH ROLLBACK IMMEDIATE
GO
USE [master]
GO
EXEC master.dbo.sp_detach_db @dbname = N'AdventureWorksOTI', @skipchecks = 'false'
GO
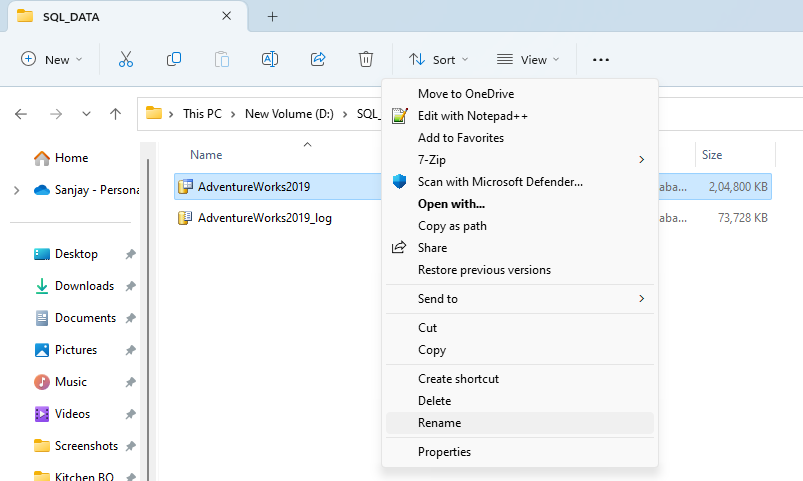
- Changing physical file name after detach the database
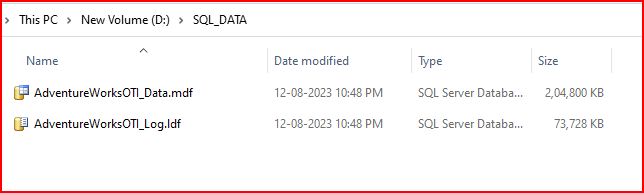
- Attach Renamed Database Online and bring the database in multi user mode
/* Attach Renamed Database Online */
USE [master]
GO

CREATE DATABASE AdventureWorksOTI ON
( FILENAME = N'D:\SQL_DATA\AdventureWorksOTI_Data.mdf' ),
( FILENAME = N'D:\SQL_DATA\AdventureWorksOTI_Log.ldf' )
FOR ATTACH
GO

/* Set Database to Multi User*/
ALTER DATABASE AdventureWorksOTI SET MULTI_USER
GO
- Reset default database for logins if required
-- Reset default database for logins

  USE [master]
  GO
  ALTER LOGIN [loginname] WITH DEFAULT_DATABASE=[YYYYYYY];
GO- Update Metadata: After renaming the database, update any metadata that references the old database name (e.g., jobs, maintenance plans, scripts).
- Add the Database Back to the Availability Group: Connect to the primary replica and add the renamed database back to the availability group. Ensure that synchronization completes successfully.
Step 4: Validate and Test
After completing the database rename, perform thorough testing to ensure that the database functions correctly, applications can connect, and data is synchronized across replicas.
- Test Connectivity: Validate that all applications can connect to the renamed database using the updated connection strings.
- Check Synchronization: Monitor the synchronization status of the renamed database across all replicas to ensure data consistency.
- Backup and Restore: Test backup and restore operations with the renamed database to ensure your existing processes work as expected.
- Replication and Jobs: Verify that replication, maintenance plans, and any scheduled jobs are functioning correctly with the renamed database.
- Job related to database need to modify: Check the job and database name, if required change it manually.
-- Retrieve information about SQL Server Agent jobs and their steps
SELECT
    j.name AS JobName,                     -- Select the name of the job and alias it as "JobName"
    js.step_name AS JobStepName,           -- Select the name of the job step and alias it as "JobStepName"
    js.command AS StepQuery,               -- Select the SQL command of the job step and alias it as "StepQuery"
    js.database_name AS TargetDatabase     -- Select the name of the target database for the job step and alias it as "TargetDatabase"
FROM msdb.dbo.sysjobs j                    -- Source table: sysjobs, aliased as "j"
INNER JOIN msdb.dbo.sysjobsteps js          -- Inner join with sysjobsteps table, aliased as "js"
    ON j.job_id = js.job_id                 -- Join condition: match job_id from sysjobs with job_id from sysjobsteps
WHERE
    j.name LIKE 'S%'                       -- Filter: include jobs whose names start with 'S'
    AND j.enabled = 1                      -- Filter: include only enabled jobs

Step 5: Communicate and Document
Communicate the successful database rename to all stakeholders and update documentation, including connection strings, backup procedures, and any other relevant documentation.
Conclusion:
Renaming a database in an Always On Availability Group requires careful planning, execution, and validation to minimize downtime, ensure high availability, and maintain data integrity. By following the steps outlined in this blog post and considering the potential impacts, you can successfully rename your database while maintaining a robust and reliable SQL Server environment.